To keep your users safe, Arcade.dev performs a user verification check when a is authorized for the first time. This check verifies that the who is authorizing the tool is the same user who started the authorization flow, which helps prevent phishing attacks.
Interested in branding your auth flow? Check out our docs on branding your auth flow.
Prevent phishing attacks by verifying your users
There are two ways to verify your with Arcade.dev:
- Use the Arcade verifier for development. This is enabled by default when you create a new Arcade.dev and works well with internal apps, solo , and proof-of-concept apps.
- Implement a custom verifier for production. This is required for multi-user apps and , as it doesn’t require your users to sign in to Arcade.dev and lets you fully control the design of the auth flow in your own application.
You can configure this in the Auth > Settings section of the Arcade Dashboard.
How to use Arcade’s default user verifier
This option requires no custom development and is enabled by default when you create a new Arcade.dev .
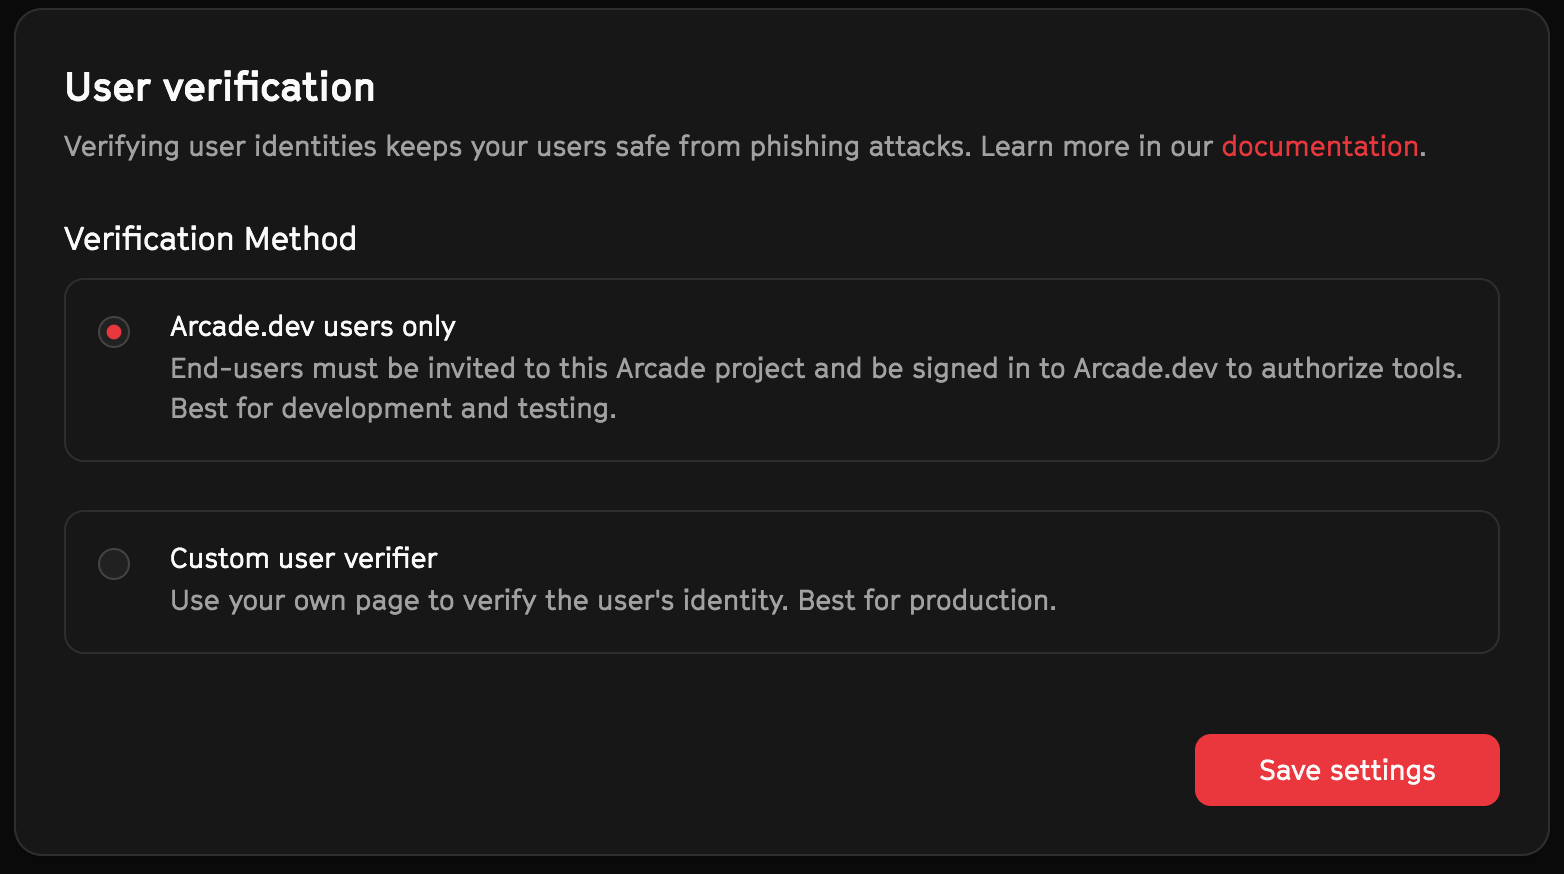
When a user authorizes a tool, they’ll be prompted to sign in to their own Arcade.dev . If they are already signed in (to the Arcade Dashboard, for example), this verification will succeed silently.
Arcade’s default OAuth apps can only be used with the Arcade verifier. If you are building a multi-user production app, you must obtain your own OAuth app credentials and add them to Arcade. For example, see our docs on configuring Google auth in the Arcade Dashboard.
How to build a custom user verifier
With a custom verifier, users are verified by your verifier, not Arcade’s.
When a user authorizes a , Arcade.dev will redirect the ’s browser to your verifier route with some information in the query string. Your custom verifier route must send a response back to Arcade.dev to confirm the user’s ID.
This allows you to fully control the experience of the auth flow in your own application. To enable this, you will need to build a custom verifier route and add the URL to the Auth > Settings section of the Arcade Dashboard.
Build a new route
Create a public route in your app or API that can accept a browser redirect (HTTP 303) from Arcade.dev after a user has authorized a .
The route must gather the following information:
- The
flow_idfrom the current URL’s query string - The unique ID of the currently signed in, commonly an ID from your application’s database, an email address, or similar.
How the ’s unique ID is retrieved varies depending on how your app is built, but it is typically retrieved from a session cookie or other secure storage. It must match the user ID that your code specified at the start of the authorization flow.
Verify the user’s identity
Use the Arcade SDK (or our REST API) to verify the ’s identity.
Because this request uses your Arcade , it must not be made from the client side (a browser or desktop app). This code must be run on a server.
JavaScript
import { Arcade } from "@arcadeai/arcadejs";

const client = new Arcade(); // Looks for process.env.ARCADE_API_KEY by default

// Within a server GET handler:
// Validate required parameters
if (!flow_id) {
  throw new Error("Missing required parameters: flow_id");
}

// Confirm the user's identity
try {
  const result = await client.auth.confirmUser({
    flow_id: flow_id as string,
    user_id: user_id_from_your_app_session, // Replace with the user's ID
  });
} catch (error) {
  console.error(
    "Error during verification",
    "status code:",
    error.status,
    "data:",
    error.data
  );
  throw error;
}Valid Response
If the ’s ID matches the ID specified at the start of the authorization flow, the response will contain some information about the auth flow. You can either:
- Redirect the ’s browser to Arcade’s
next_uri - Redirect to a different route in your application
- Look up the auth flow’s status in the Arcade API and render a success page
JavaScript
// Either redirect to result.next_uri, or render a success page:
const authResponse = await client.auth.waitForCompletion(result.auth_id);

if (authResponse.status === "completed") {
  return "Thanks for authorizing!";
} else {
  return "Something went wrong. Please try again.";
}Invalid Response
If the ’s ID does not match the ID specified at the start of the authorization flow, the response will contain an error.
JavaScript
console.error(
  "Error during verification",
  "status code:",
  error.status,
  "data:",
  error.data
);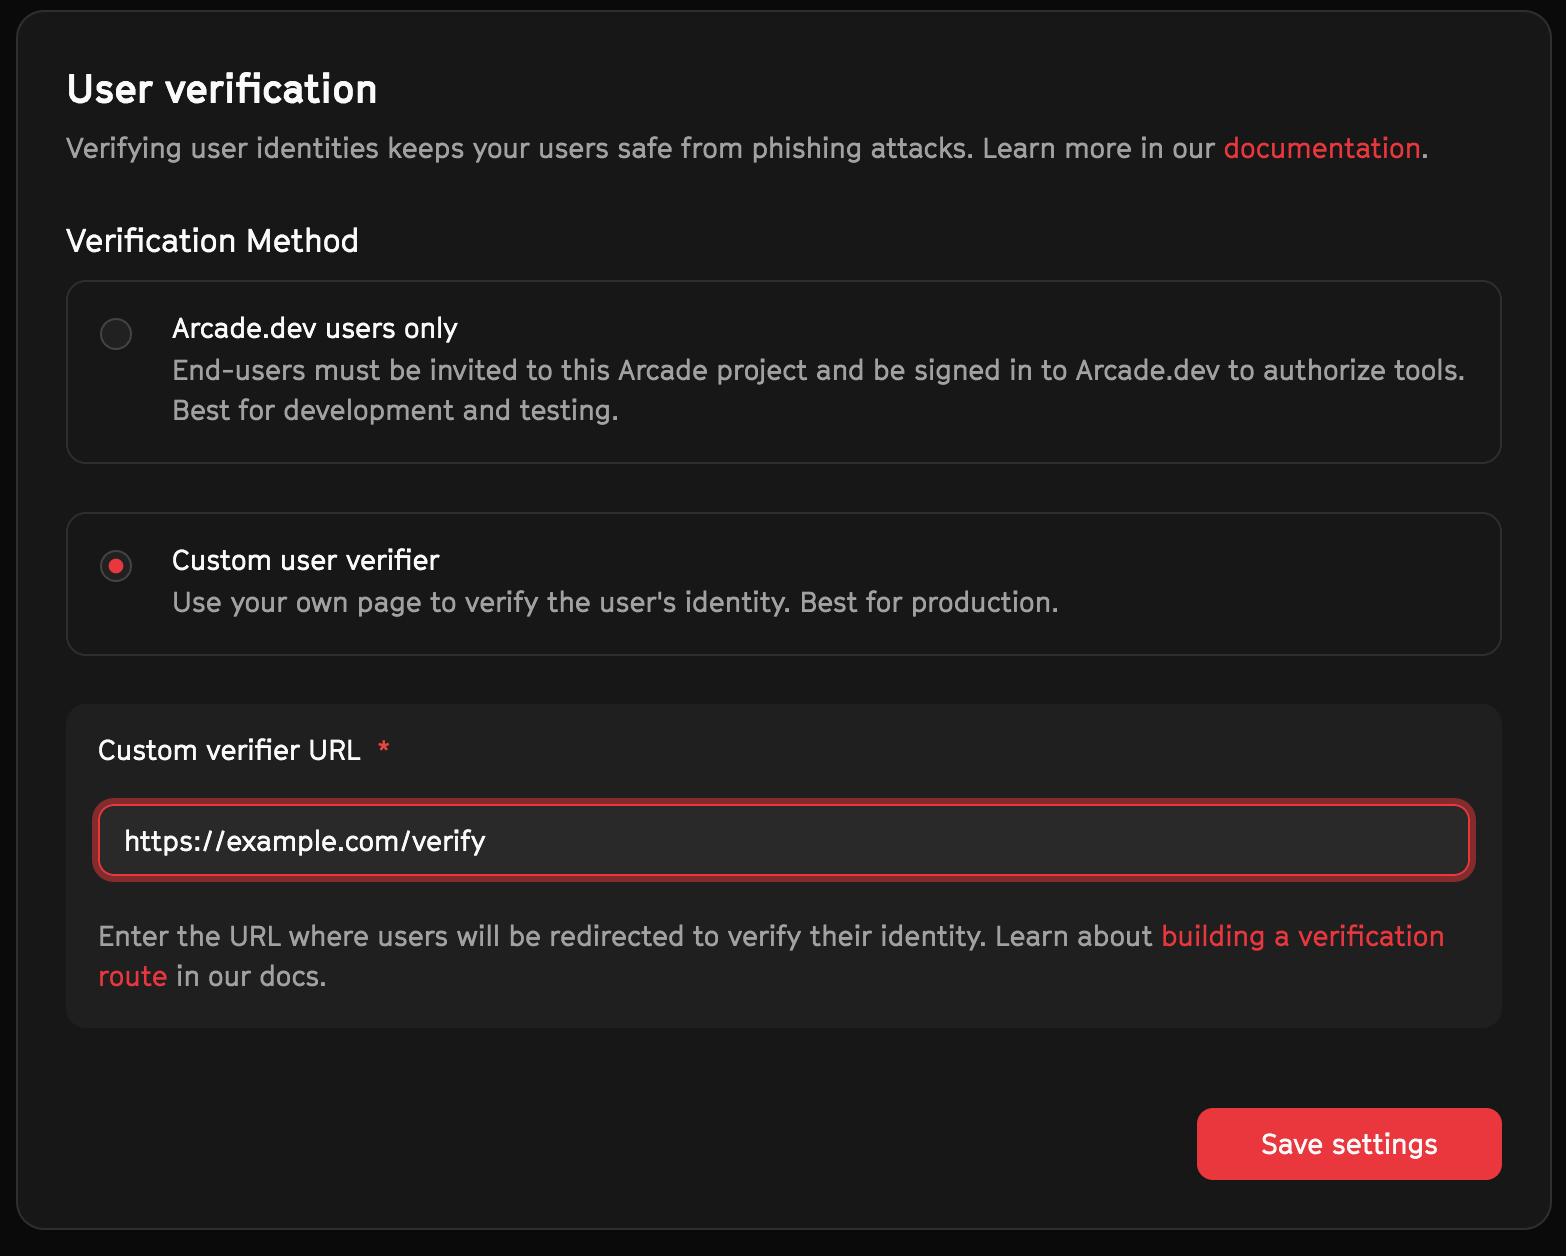
throw error;Add your custom verifier route to Arcade
In the Auth > Settings section of the Arcade Dashboard, pick the Custom verifier option and add the URL of your verifier route.
Arcade’s default OAuth apps only support the Arcade verifier. Authorization flows using Arcade’s default OAuth apps will use the Arcade user verifier even if you have a custom verifier route set up.